Saturday, July 12, 2014
Volcano experiment.
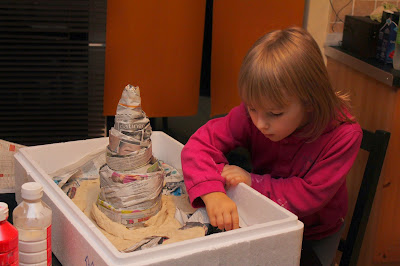
OK! Here is some seriously nice and fascinating two day project - build your own volcano and see it erupt! Excuse the Christmas tree in the background, we did this over Christmas and came across these pics just now..
However! This is how we made our volcano --->
You will need
1. a box
2. an empty bottle of wine or champagne or similar bottle with a nice, round shape.
3. old newspapers
4. glue
5. toilet paper
6. dough (simple flour + water)
7. paint (whatever colours you want your volcano to be + some for the ground around it.
Take an empty bottle and place it in the box. Fold newspaper pages in strips and start wrapping it around the bottle. Use sellotape to secure ends over each other. Keep wrapping the bottle until the whole bottle is covered.
Start making dough. Knead it well till it is not sticking to your hands. Once it is ready wrap it around the end of the bottle, it will serve as weight to hold the bottle in place. Use plenty of it, spread it all over the base of the box building uneven ground.
Now it's time to plaster the volcano. Apply glue all over the volcano. I used all purpose PVN glue. Then start applying toilet paper all over the glue. Don't be afraid - mess it up a bit as it will only create a rougher and more natural looking surface. Let it dry. Don't cover the hole.
Once it's dry - it's time to paint the whole scene! We started with dark grey at the bottom of the volcano and worked up lighter colours making the top completely white full of snow :)
For the ground we used more dramatic colours - brown, orange, dark green, some red spots.
Then take some small branches of a tree and stick it in some of the dough you applied for the ground.
Bring on all dinosaurs and make your project alive!
To make your volcano active prepare the lava - 1/4 cup vinegar (up to a cup for larger bottles),
6 - 8 drops of liquid dish soap,
2 tablespoons baking soda,
red food colorant.
Fill the bottle about 2/3 full with very warm water. Add the vinegar and dish soap to the bottle. Put good bit of food colorant. To initiate the erupting volcano project, add the soda mixture to the vinegar all at once using the funnel or tissue paper method. Stand back and enjoy!
Here is a quick video of our volcano erupting.
Building igloo scene!
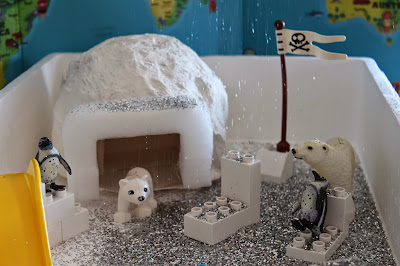
We do love our arctic scenes! How can you not - it's so much fun with shifting sparkling snow and sliding penguins on ice slides :)
Again, this is a great way to study map of the world, get familiar with continents, temperatures around the world, animals and many more.
It took us a while to come up with this igloo.. We tried so many lovely projects from Pinterest but we just couldn't get it right. Sugar igloo melted, marshmallow igloo fell apart.. I had no other choice than to come up with my own design which, I believe, is the most complicated igloo ever made.... :/
Here is how we did it: For the roof we used our previously made bird nest. Here is how to make it.
We put the roof on an empty sugar box.
After that we took a paper plate, placed the tea box with the roof on it, then we took a white sellotape and started to wrap it all around 3 parts keeping the round shape but leaving the front open for the entry.
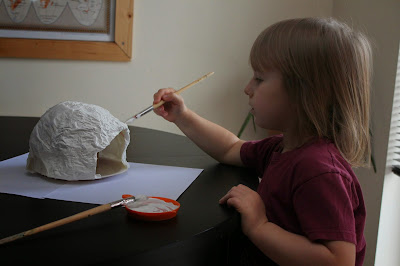
Once that was done we applied glue all over it and covered our igloo with toilet paper. Glue + toilet paper is a great way how to get a rough, natural looking surface.
Once it was dry, we put an extra white colour over it to make it snow white.
I found some white foam lying around and attached it to the entrance of the igloo.
Finally our igloo was ready to play with!
At the end it was worth all the troubles, all the trying and non-stop drying :)
Friday, July 11, 2014
Pencil shavings.
I remember doing this activity when I was a child. The way you can blend colours on a paper allows you to get a soft and gentle background. And not to mention the joy of children using their little fingers to paint :)
How to do it: sharpen your pencils on a paper keeping every leftover.
If you know what colours and where you want to use - sharpen each colour over the area you will want to colour.
Then take all the big pieces aside for later. With your finger start to rub tiny pieces of pencil into the paper.
Once the background is done - you can use leftover shavings and create some design over the coloured paper! We made these pretty flowers :)
Subscribe to:
Comments (Atom)


